 Welcome back to Advanced Tactics college! It has been some time since the last lesson, but I have been away to code on the next DC title in a log cabin in the north of Sweden this summer. So far we have discussed combat troops and equipment, today we will tackle a slightly different subject: troop transportation and motorization by land transport vehicles.
By putting transport vehicles in your HQ you will provide your HQ with transfer capacity points. Trucks and halftracks provide 1000 regular land transfer points per vehicle and trains will provide 2000 rail transfer points. Horses do not provide any transfer points. These transfer points allow you to strategically transfer whole units from one place on the map to the other side or to transfer individual troops from your HQ to frontline units many dozens of hexes away. It is important to realize that trucks, halftracks and trains only provide transfer capacity points when they are stationed in HQ units, when they are stationed in normal units they just mobilize the troops in that specific unit.
If you are in a scarcity of production situation this means you’ll have to chose between mobile frontline formations or high HQs that enable you to reinforce and (strategically) transfer.
A prudent player always makes sure he has at least some HQs with some transfer capacity. Because this will allow this player to make some emergency moves to react to enemy threats. Agreed… only a limited number, but most of the time that is all you need to contain or slow down a surprise enemy offensive, unexpected paradrop or amphibious landing. Time bought by containment will allow you to move in larger forces by foot, horse or own motor transport.
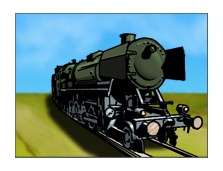
Trains are by far the best to use to provide these transfer capacity points. First of all because trains do not use oil when you use their rail transfer capacity points, secondly because they provide double the amount of points that trucks and halftracks provide. However the downside of using trains is that any transfers you do are limited to what can be reached by rail-lines. Trucks and halftracks don’t suffer this limitation.
 Though trucks spend oil while they (strategically) transfer troops, they are cheaper to build then trains in terms of raw resources and production time. Trucks are also the more flexible buy, since they can be switched from HQs to units to provide motorization. Granted you can send trains to frontline units as well. But “motorization” by train will limit them to railroad tracks and in most cases it is only practical to do so for artillery and flak units.
A transfer point basically represents the ability to transport 1 weight unit (for example 1 infantry) over 1 action point. For example: transferring 10 infantry over 10 hexes connected by rail movement (10 ap per hex) will cost a 1000 transfer capacity points. Keep in mind that the action point cost of a certain strategic transfer from hex A to hex B is not the “straight line” cost between those hexes but a “triangulated” cost from hex A to the hex of the HQ providing the transfer points and from there to hex B.
Now using your transport vehicles for transfers is one option. The other option is to use them to motorize units. In theory you could use trains to do this (as discussed above), but in practice trucks and halftracks will be more practical since they will allow your unit to move outside rail hexes. Trains, trucks and halftracks can all carry 20 weight points, for example 20 infantry or 2 artillery guns.
Especially when you are the player that is on the offensive it is very useful to have at least some motorized artillery, engineer and flak units to support the advance of any “panzer” units you might have. For if your panzer spearheads drive forward so fast they outrun their artillery complement and infantry they will have a much harder time defeating enemy units and holding the territory they take.
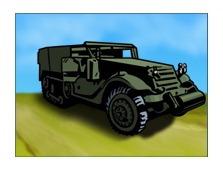 If your motorized troops are going to participate in direct land combat you might want to issue them with halftracks instead of trucks. Yes halftracks are more expensive, and need to be researched first, but they provide a unique feature: they take hits for the infantry in combat. Every time an infantry guy is targeted by the enemy there is a 50-50 chance the enemy will fight a halftrack instead of the targeted infantry.
For example 5 light tanks attacking 100 lightly entrenched infantry will have a 55% chance of success and on average will kill 29 rifle while losing 1 tank. Using the same example but with the change that the defending 100 infantry are now supported by 5 halftracks the chance of success will drop to 32% and the average number of rifle killed to 21 and average halftracks lost is 0.2, while average tank losses go up to 1.5.
The low number of halftrack kills in the example above is partly due to the sturdiness of these vehicles and partly due to their mobility to escape dangerous situations more easily then trucks: they have a 30% chance to translate a kill hit on them to a retreat hit.
Furthermore halftracks will do better than trucks if under air attack since they have eight times more hit points. Halftracks are also slightly quicker off-road since they are tracked instead of wheeled. If you have the production power and the resources then halftracks can make a subtle but decisive difference.
That concludes this lesson. Thank you for your time and good luck with motorizing your army! Next lesson will probably focus on naval warfare, ships and submarines.
 Flak is what you should buy if you have lost air supremacy. Flak is also what you should buy if your still fighting for air superiority. In the first case you will need flak to protect your panzers and artillery. In this case flak will be your only hope to have some chance of successfully going on the offensive. In the second case you will be smart to add some flak guns to your airfields since it will help you win the battle for air supremacy.
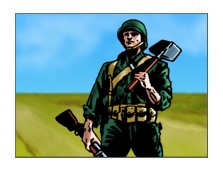 The engineer is a specialized troop type. It fights at only half the strength of rifle infantry. Its important to realize that engineers are not combat-engineers. Engineers are your construction troops! They can perform a wide variety of tasks, that only they can perform. They can build roads and bridges, the can demolish bridges and locations and they can construct a variety of locations including ports, airfields, fortifications and factories/shipyards. They can also upgrade resource locations.
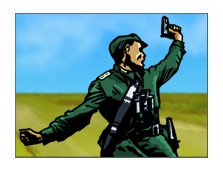 Is a specialized troop type. Staff fights only half as well as regular rifle infantry, but that’s ok since they will not be deployed in the frontline and see little actual fighting. Staff should be deployed in your HQ units. Staff is the only troop type with staff points. Each staff has 10 staff points. This means it can direct the operations of up to 10 power points of regular troops in units subordinate to the HQ the staff is stationed in. The game will show you if you have enough staff in your HQ to direct the battles of all subordinate units by showing a STF % in the unit info window.
 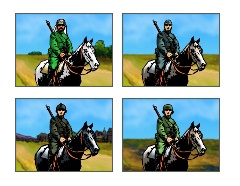 Is an expensive infantry troop type that requires no research to produce. However its levels will go up when you research infantry. Although it has the same number of hit points as rifle infantry it is three times as expensive (in production points) to build. Off-setting this costliness cavalry has three times the offensive value of regular rifle in attacking enemy infantry, artillery or soft-mobile. However that in itself would not make it a valuable troop type since using three rifle instead of one cavalry would still be much more cost-effective, especially in defense.
  Welcome back to Advanced Tactics Gold college! Today we discuss ships! Let’s start with the basics: Not every map with sea hexes on it requires you to have a navy. A navy is only necessary if you want to invade hostile territory and conduct amphibious operations or if you want to (strategically) transfer troops overseas.
  The first type of ship that we’ll discuss is the Cargo Ship. Its costs 2000 production points and 20 raw to produce. The Cargo Ship is the Train/Truck of the oceans, so to speak… You can place your Cargo Ships in a HQ located in a port city to enable that HQ to (strategically) transfer troops overseas. But you can also put your Cargo Ships in regular units and use them to load/unload land unit troops. The Cargo Ship is the only type of ships that allows loading and unloading of units and thus your only means to conduct amphibious invasions into enemy held territory overseas. The Cargo Ship is very weak in combat and should always be escorted when you expect either enemy ships or enemy airstrikes.
 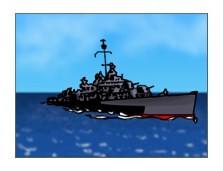 An ideal escort is the Destroyer. The Destroyer is a relatively cheap naval unit and is just 10 raw more expensive then the Cargo Ship. The Destroyer is the lightest ship of war available and will perform well against Cargo Ships, other Destroyers and Submarines. However when facing heavier ships of war the Destroyer will only be temporarily capable of protecting your Cargo Ships.
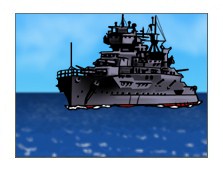 The two capitol ships of war are the Cruiser and the Battleship. They rule the waves but come at heavy cost. Producing a Cruiser takes 4000 production points and 70 raw, a Battleship 8000 production points and 160 raw. However if you are serious in attaining naval superiority these ships are a good investment. They are vulnerable to submarine attack, but you can protect them by assigning a Destroyer escort. The Battleship is on a cost-versus-effectiveness comparison better in ship-to-ship combat and shore bombardment then the Cruiser, but the Cruiser has better anti-air capabilities. A battleship attacking a Destroyer for example has 50% chance to kill the Destroyer but only 5% chance to get killed itself. A Battleship attacking a Cruiser has 50% chance to kill the Cruiser, but only 10% chance to get killed itself.
  Now the submarine is a bit of a special unit. It has 20 hide points making it harder to spot by enemy forces. Basically it is best used in attacking unescorted Cargo Ships and capitol ships and causing anti-supply damage to enemy supply lanes. Submarines should avoid fighting Destroyers at all cost. For example a Destroyer attacking a Submarine has 30% chance to kill it while it has only 7.5% chance to get killed itself. Also Submarines should avoid coming under air attack at all cost. Submarines are relatively cheap ships with a higher survival rate in combat due to their ability to submerge (turn a kill hit into a retreat hit), but you must remember they are weak units. A submarine is preferably used in an offensive role, since it is very weak when attacked itself. For example: A submarine attacking a Battleship has 12.5% chance to kill it versus a 30% chance to get killed itself, but a Battleship attacking a Submarine has 30% chance to kill the submarine versus only 5% of getting killed itself.
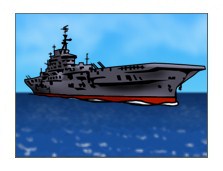 The most complicated and expensive ship to properly use is probably the Carrier. The Carrier is as expensive as the Battleship and though it has some solid anti-air defenses it is vulnerable to almost any form of direct naval attack. The Carrier should be kept out of combat or be heavily escorted. The key to making the Carrier investment pay off is to transfer the maximum amount of aircraft to the Carrier unit that you can. Ideally you’ll have researched carrier fighters and torpedo bombers since they take less space on the Carrier then regular aircraft. For example a Carrier can carry 10 carrier fighters but only 5 normal fighters. Torpedo bombers are in a cost-versus-effectiveness comparison the best unit to destroy enemy ships. A Carrier with full aircraft compliment will be a decisive asset when fighting out major naval engagements in big oceans. For example 5 torpedo bombers have a chance of 50% of killing a Battleship while on average losing only 1 aircraft.